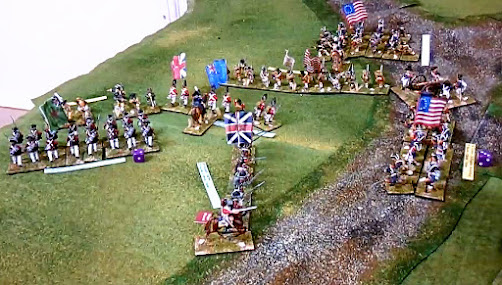
This week saw the conclusion of The Battle of The Clouds, an AWI clash in which the British struggled to drive their way through the American line. The battlefield had split into two wings, with the Americans being able to set up murderous cross fire at the head of the two British attacks. It remained to be seen whether the British could keep up enough pressure on the American units in front of them to force a break in the line which would allow them to push on and remove the threat of the American artillery.
A rather dizzying bird's eye view of the American left wing. British Lights are in the wood to the left whilst the Americans are poised to deliver volleys of devastating fire into the ranks of the advancing British.
Turn 6 saw the Americans gain the initiative and they declared a charge towards the British on this flank who opted to stand and fire. The 3rd Division pivoted to face the wood. The Queen's Rangers moved to the edge of the wood to threaten the 5th Division. The Hessians inclined to the right.
On the right flank the British Guards charged, as did the 4th Brigade. The American column moved further along the flank in case the British managed to finish off their opponents.

Alexander's 5th Division failed to press home the charge and retreated facing the British. For a moment it looked as if the British had an opportunity to drive into the American line and escape the cross fire on this flank. Cornwallis readied his dice and prepared to face one more turn of cutting fire. However, one casualty from the artillery, and a total of four more from musket fire meant that Grant's brigade lost a base and this proved too much for them. Even though they were Veterans, the perils of their situation and the sustained mounting casualties proved too much for Grant and his men who promptly fled. Fortunately, the Hessians behind them stood firm. The 5th Division also lost a base from combined casualties from the Queen's and Vaughan's brigade and the Militia took just one casualty. The sudden opportunity to make headway had vanished in an instant!
On the American right flank, the British charged home in a valiant attempt to shatter the Americans and send the Rebels packing. The Artillery had caused two casualties on the 4th brigade which lost a base and received three more from closing fire. The charge struck however but whilst the casualties were three apiece from the melee, the 4th were severely battered from four turns of fire and they retired facing the enemy. The Guards crashed into Wayne's Division in what was probably the best British opportunity to punch through, but the Americans came off one casualty better and the Guards were forced to withdraw facing the enemy. The 3rd brigade fired a devastating volley at the troublesome American skirmishers meaning they too lost a base.
Turn 7 again saw the Americans gain the initiative. The skirmishers fell back, the column moved forward onto the hill behind Wayne's division which fell back to clear the line of sight for its artillery.
On the other flank, the 3rd Division charged the edge of the wood, forcing the Queen's Rangers to evade and providing relief to 5th Division who were able to steady themselves.
Above it can be seen that the British pulled back a little, holding on to the slender hope that a round of musket fire may cause Muhlenburg's Division to falter. It was not to be. Artillery continued to chip away at the Guards who stood firm. The American skirmishers finally routed from the field after another volley from the 3rd brigade, but their departure didn't make an impact on the morale of the Americans. Muhlenburg's Division also stood firm and the last hope of a British push crumbled away.

In the post battle discussion, we considered the challenges facing the British. For them to be able to put pressure on the Americans at a point of their choosing, it would require substantial maneuvering. The original half a plan sought to neutralise some of the American forces by pinning the flanks and concentrating the main thrust up the middle. The vagaries of command and control however meant that it's very difficult to pull off a coordinated attack. If one brigade refuses to move for a turn it can cause chaos and reveal intentions allowing the enemy time to react and reorganise to face the threat. It was a mistake to ignore the American skirmishers on the right flank. Perhaps if the Hessians had moved towards the centre and the 3rd and 4th Brigade had the flexibility to exploit American indecision on how to move to counter the thrust things might have been very different. As it was, the British withdrew, leaving American Divisions that were largely in good shape. We also need to consider the morale modifiers. Units are punished for losing a base, and if these are cumulative as well as being penalised for loss of 25% and then 50%, there is very little opportunity to be able to probe and then consolidate. Unless units are large, or the attackers have vastly superior numbers, the attacker has an almost impossible task.
Thanks to David for setting up the game, moving the figures and switching the camera views. Next week we will be in the Ancient world - Greeks against Greeks- trying out a set of rules created by one of our members.
Please consider following our blog and maybe add a comment below. It would be especially interesting to hear of any other refights of this battle in the light of our experiences. Can you come up with half a plan that sweeps the Rebels from the field?


